# electron-admin-element-vue
electron-admin-element-vue(GitHub (opens new window)、Gitee (opens new window)) 是在
admin-element-vue(GitHub (opens new window)、Gitee (opens new window))的基础上结合 vue-cli-plugin-electron-builder (opens new window) 构建的桌面Admin。
# Demo
注意:Demo 用的是在线mock服务,不稳定,若登录不了pull到本地可直接运行查看demo
下载自己需要的版本进行安装
| 下载链接 |
|---|
| electron-admin-element-vue-v2.0.0-win32-ia32-setup.exe Github (opens new window) Gitee (opens new window) |
| electron-admin-element-vue-v2.0.0-win32-x64-setup.exe Github (opens new window) Gitee (opens new window) |
| electron-admin-element-vue-v2.0.0-mac.dmg Github (opens new window) Gitee (opens new window) |
| 图片预览 |
|---|
 |
 |
# 目录结构
electron-admin-element-vue 在 admin-element-vue 目录结构基础上新增以下目录与文件
├── build                      # 构建资源
│   └── icons                  # 图标目录(尺寸最小256x256)
└── src                        # 源代码
    └── background.ts          # Electron 主进程
2
3
4
# 安装
# 克隆项目
git clone https://github.com/lqsong/electron-admin-element-vue.git

# 进入项目目录
cd electron-admin-element-vue

# 复制文件
copy .env.development  .env.development.local # 启用或修改里面的参数

# 安装依赖,推荐使用 yarn
yarn
# or
npm install

# 本地开发 启动项目
yarn electron:serve
# or
npm run electron:serve
2
3
4
5
6
7
8
9
10
11
12
13
14
15
16
17
18
推荐使用 yarn , yarn安装与常用命令 (opens new window) 。
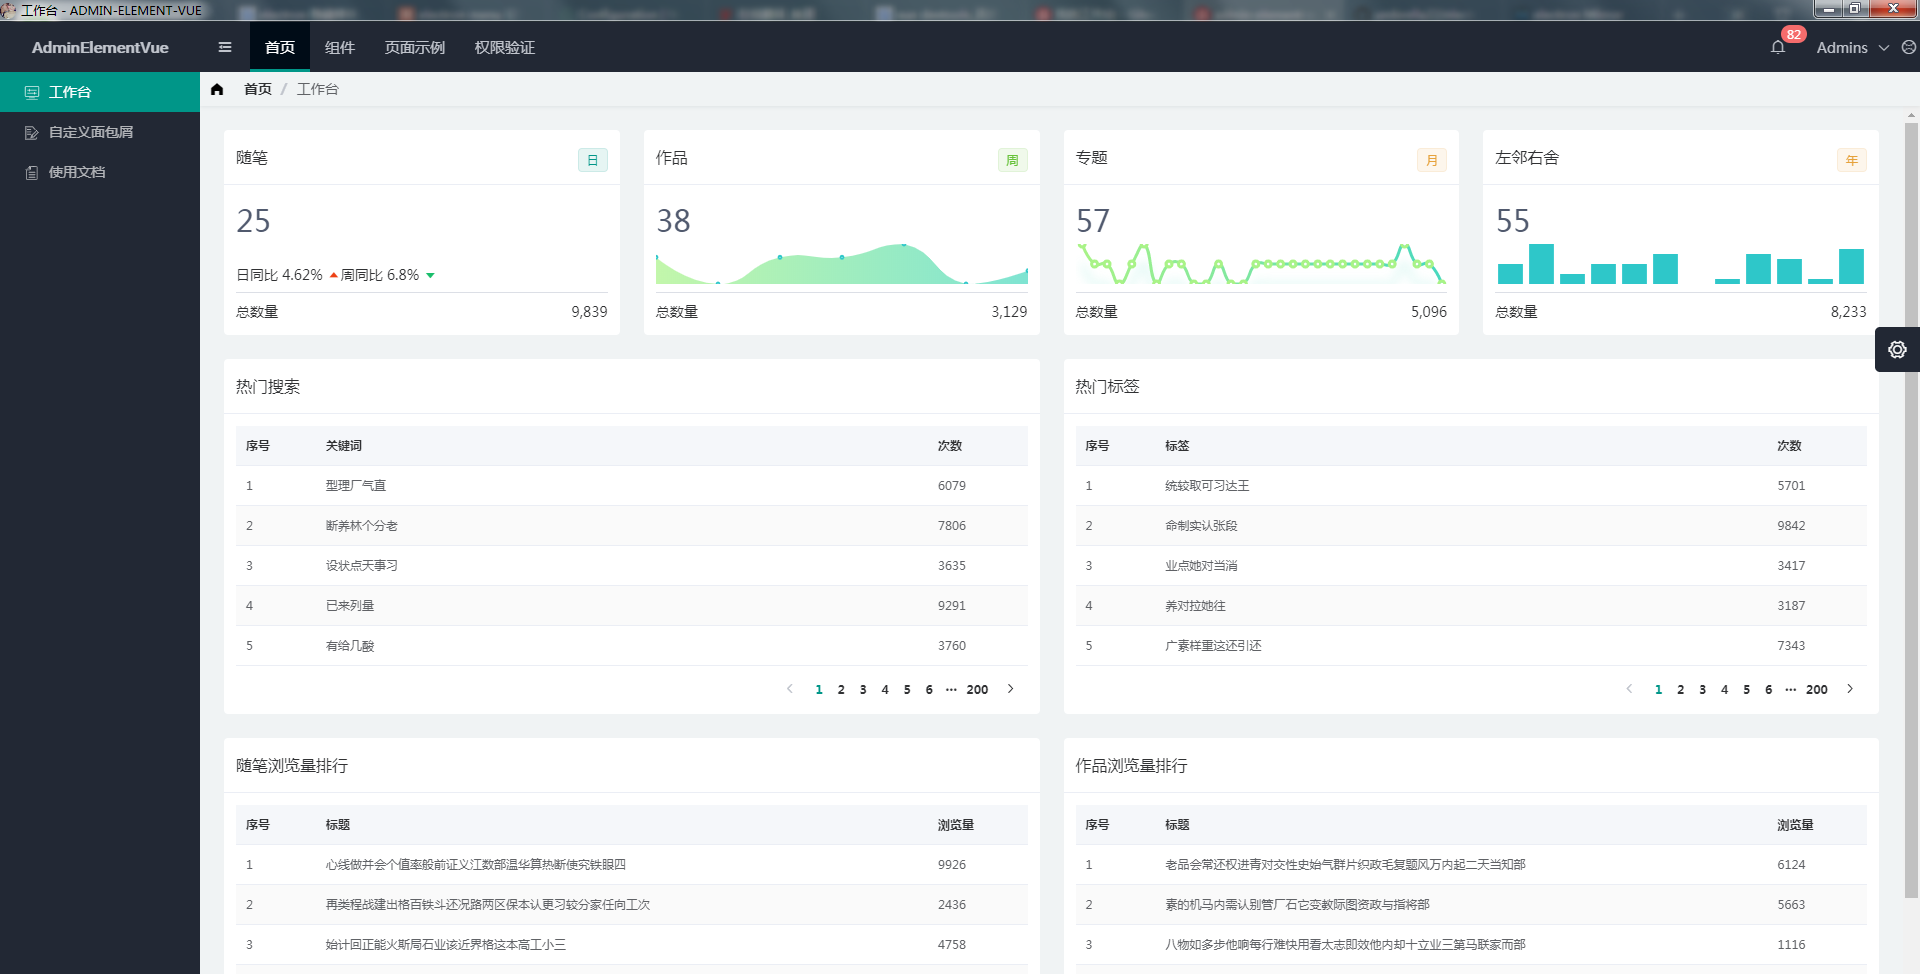
启动完成后会,会自动打开 Electron 窗口, 你看到下面的窗口就代表操作成功了。

# 配置
electron-admin-element-vue 在 admin-element-vue 的基础上新增了以下配置.
# scripts 配置
package.json 中 scripts 增加了以下命令参数:
  "scripts": {
    // 构建 electron 项目
    "electron:build": "vue-cli-service electron:build",
    // 开发 electron 项目
    "electron:serve": "vue-cli-service electron:serve",
    // 下载 app 依赖
    "postinstall": "electron-builder install-app-deps",
    "postuninstall": "electron-builder install-app-deps",
  },
2
3
4
5
6
7
8
9
# 构建配置
vue.config.js 中增加了以下配置:
module.exports = {
    pluginOptions: {
        electronBuilder: {
            // electron 构建配置
            builderOptions: {
                productName: 'electron-admin-element-vue', // 项目名,也是生成的安装文件名,即electron-admin-element-vue.exe
                appId: 'cc.liqingsong.electron-admin-element-vue', // 包名
                copyright: 'Copyright © 2018-present LiQingSong', // 版权
                nsis: {
                    oneClick: false, // 是否一键安装
                    allowElevation: true, // 允许请求提升。 如果为false,则用户必须使用提升的权限重新启动安装程序。
                    allowToChangeInstallationDirectory: true, // 允许修改安装目录
                    installerIcon: './build/icons/icon.ico', // 安装图标
                    uninstallerIcon: './build/icons/icon.ico', // 卸载图标
                    installerHeaderIcon: './build/icons/icon.ico', // 安装时头部图标
                    createDesktopShortcut: true, // 创建桌面图标
                    createStartMenuShortcut: true, // 创建开始菜单图标
                    shortcutName: 'electron-admin-element-vue' // 图标名称
                },
                dmg: { // macOSdmg
                    contents: [
                      {
                        "x": 410,
                        "y": 150,
                        "type": "link",
                        "path": "/Applications"
                      },
                      {
                        "x": 130,
                        "y": 150,
                        "type": "file"
                      }
                    ]
                },
                mac: { // mac
                    icon: "./build/icons/icon.icns"
                },
                win: { // win 相关配置
                    icon: './build/icons/icon.ico',
                    target: [
                        {
                          target: "nsis", // 利用nsis制作安装程序
                          arch: [ // 这个意思是打出来32 bit + 64 bit的包,但是要注意:这样打包出来的安装包体积比较大,所以建议直接打32的安装包。
                            // "x64",
                            "ia32"
                          ]
                        }
                      ]
                },
                linux: {
                    icon: "./build/icons"
                }
            }
        }
    }
}
2
3
4
5
6
7
8
9
10
11
12
13
14
15
16
17
18
19
20
21
22
23
24
25
26
27
28
29
30
31
32
33
34
35
36
37
38
39
40
41
42
43
44
45
46
47
48
49
50
51
52
53
54
55
56
57
builderOptions中的更多参数,参考 electron-builder (opens new window)。
# 构建
当项目开发完毕,只需要运行一行命令就可以打包你的应用:
# 打包正式环境
yarn electron:build
# or
npm run electron:build
2
3
4
构建打包成功之后,会在根目录生成 dist_electron 文件夹,里面就是构建打包好的文件,详细文档参考:electron-builder (opens new window)。
TIP
其他内容与 admin-element-vue 一致,相关内容说明请参考文档其他说明。
← 错误处理